If you’re using Klaviyo, a powerful email marketing platform, you may have come across the term “DKIM” and wondered what it means. DKIM, or Domain Keys Identified Mail, is a security measure used to prevent email spoofing and protect the reputation of your domain. In this blog, we’ll explain what DKIM is, why it’s important, and how to set up a DKIM record in Klaviyo.
What is DKIM?
DKIM is a way to verify the authenticity of an email by adding a digital signature to it. This signature is created using two authentication keys: a private key that is stored in your SMTP (Sender Mail Transfer Protocol) and a public key that is stored in a public DNS zone.
When you send an email, it is signed with your email domain’s private key. The recipient’s mail server then checks the authenticity of the key by comparing it to the public key on the server. If the keys match and there is no evidence of tampering, the email is allowed to be delivered to the recipient’s inbox. This helps protect the sender’s reputation and ensures that the email will not be marked as spam.
If you do not set up DKIM, it is possible for someone to impersonate you and send emails from your account (which is called spoofing).
Why is this important for Klaviyo users?
When you send emails through Klaviyo, your emails will be sent from Klaviyo’s servers, not your own. This means that the recipient’s email server will see the email as coming from Klaviyo’s domain, not yours. Without a DKIM record, the recipient’s email server may be more likely to mark your email as spam, since it doesn’t recognize your domain as the sender.
To prevent this from happening, you can set up a DKIM record in Klaviyo. This will allow you to digitally sign your emails with your domain, so that the recipient’s email server will recognize your domain as the sender.
How to set up a DKIM record in Klaviyo?
⚠️ Setting up a dedicated sending sub-domain is the only method of authentication Klaviyo supports at this time. It does not support the use of DKIM and SPF records for your root domain (TLD) for authentication purposes.
To set up a DKIM record in Klaviyo, follow these simple steps:
Step 1: Go to Klaviyo Settings
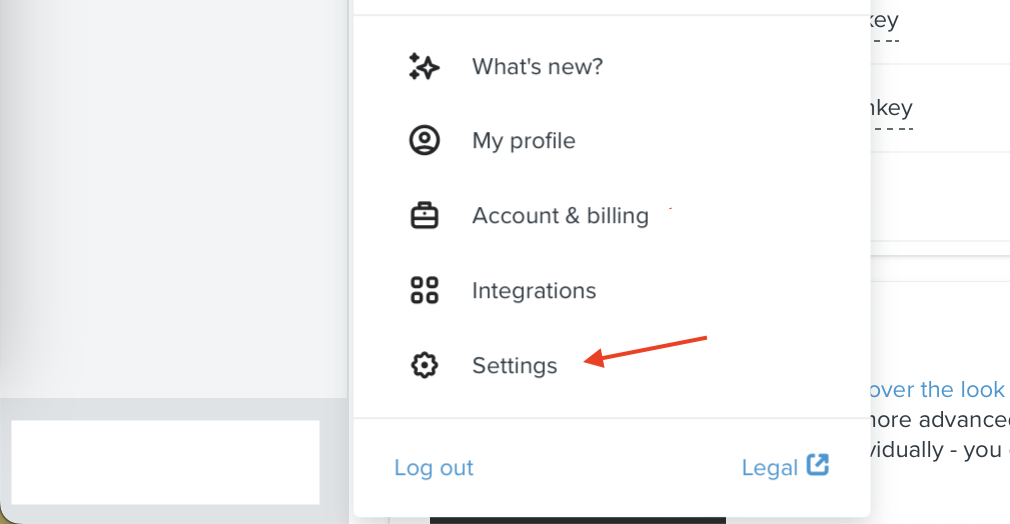
Navigate to Klaviyo, locate your account name on the bottom left of the screen and select “Settings”.
Step 2: Domains and Hosting
Once there, select “Domains and Hosting”

Step 3: Click on “Get Started”
Click on “Get Started” button to start the setup process.

Step 4: Enter domain details
Enter your root domain name, a sending sub-domain name, and click Continue.

Step 5: Check DNS records
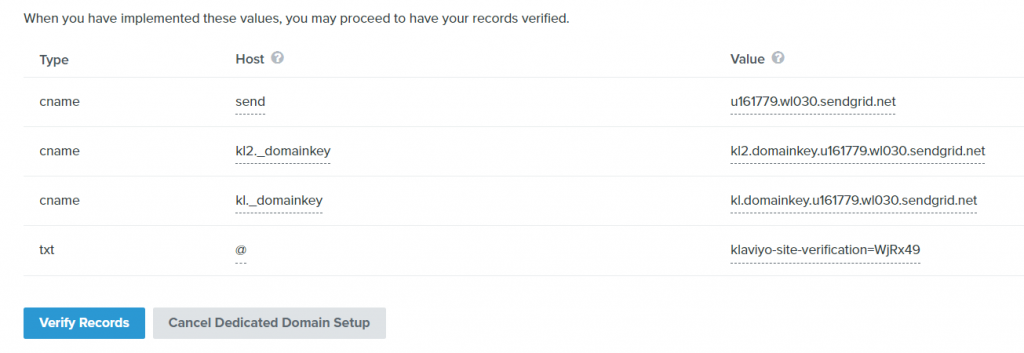
When step 4 is concluded, Klaviyo provides records for you to add in your DNS Zone. Let’s start adding the records from top to bottom.
Step 6: Copy DNS records
Head to your DNS zone editor and copy these records and pass the values provided by Klaviyo in the above screen.

Step 7: Verify DNS records
Once all the records are added in your DNS zone, navigate back to Klaviyo and click on the “Verify Records” button
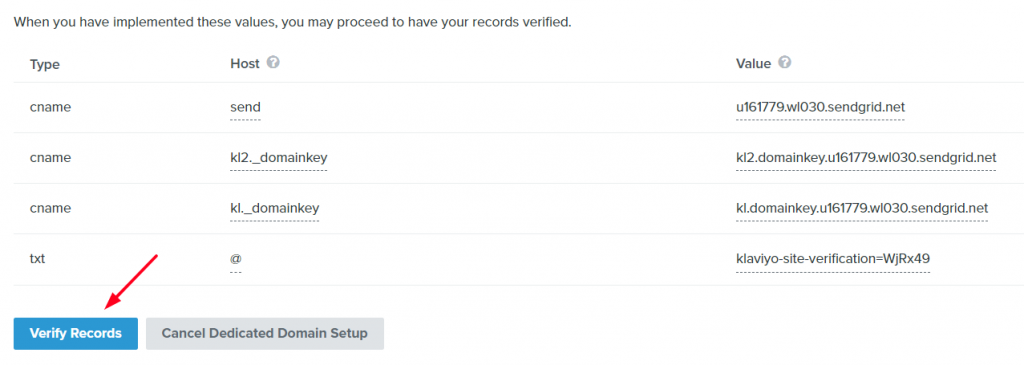
When clicked, a pop-up will appear to ensure all records are set up correctly, click on the “Close” button.

Step 8: Apply Domain settings
When clicked, the system will automatically navigate you back to the “Domains and Hosting” section. Now, we need to apply all the changes for your domain by clicking on the “Apply Domain” button.
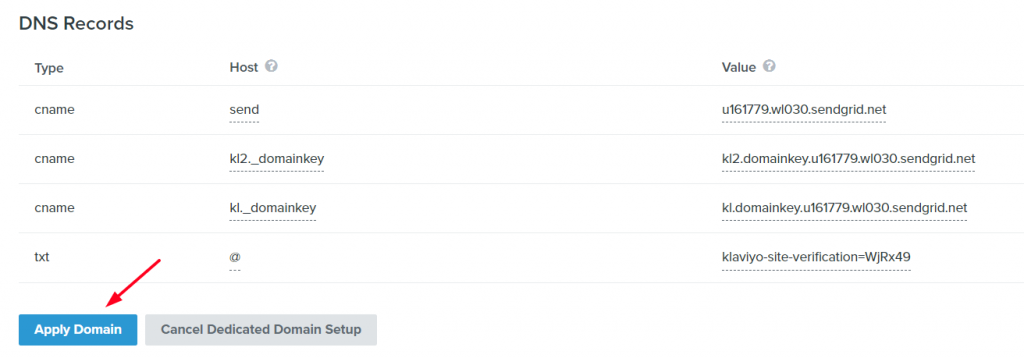
When clicked, a pop-up will appear, enable the checkbox and click on the “Apply Domain” button.

After the last step, a message will be shown that includes your domain is set up correctly and it will pass the DMARC check!

Verify the DKIM DNS records
To confirm the DKIM records are set up correctly you can use a DKIM Lookup Tool.
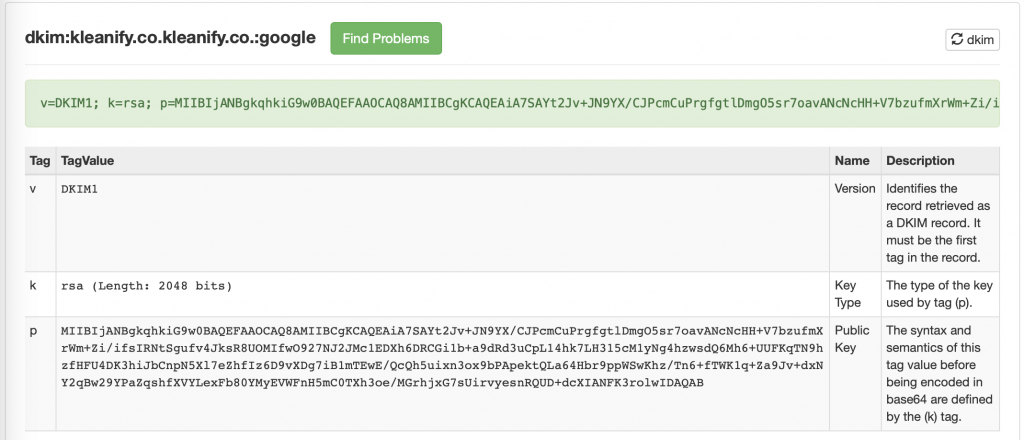
When the DKIM status is shown the green color, that indicates the record is set up correctly.
And this is how Klaviyo DKIM setup is done!
In conclusion, setting up a DKIM record in Klaviyo is an important step in protecting the reputation of your domain and ensuring that your emails are not marked as spam. By following the steps outlined above, you can set up a DKIM record and start sending emails with confidence.


